


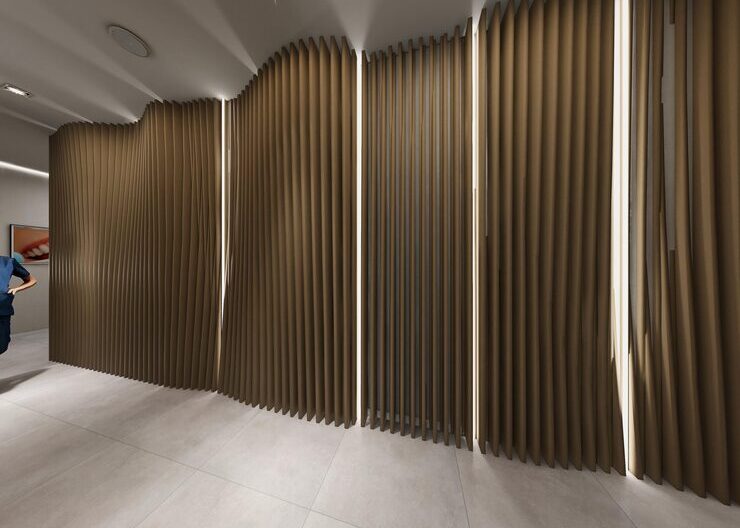
Planning an acoustic operable wall installation requires careful coordination across four key phases: site measurement, structural assessment, track planning, and panel configuration. Each stage directly affects acoustic performance and long-term functionality. Done correctly, the result is a partition system that delivers consistent sound attenuation, clean operation, and a finish that meets both design intent and building compliance requirements.
Why Proper Planning Matters Before Any Installation Begins
Operable walls are not off-the-shelf products. They are engineered systems designed to fit specific structural conditions. A miscalculation in ceiling height, track alignment, or panel sequencing can compromise the entire acoustic seal — turning a high-performance partition into an expensive noise-leaking divider.
For project managers and main contractors in Singapore, planning failures at this stage typically result in costly rework, programme delays, and disputes with acoustic consultants. Getting the sequencing right from the outset is non-negotiable.
Step 1: Conduct Accurate Site Measurements
Before anything is specified or ordered, a full dimensional survey of the opening must be completed. This is the foundation of every decision that follows.
What to Measure
- Clear opening width and height — measure at multiple points, as walls and floors are rarely perfectly parallel
- Floor-to-soffit height — critical for determining panel height and acoustic seal performance
- Floor levelness — variations greater than ±3mm across the opening will affect the bottom seal
- Ceiling void depth — required to assess whether the track and panel stacking space can be accommodated
Use a laser level for all measurements. Manual tape measurements introduce tolerance errors that compound during panel fabrication. Document all readings and photograph existing conditions, particularly at the head and jamb details.
Step 2: Assess Structural Ceiling Support Capacity
The track system for a movable wall installation is suspended from the ceiling structure above. This is the most critical — and most frequently underestimated — element of the planning process.
Key Structural Checks
- Confirm the ceiling slab or beam can carry the imposed load of the full panel stack, typically ranging from 50 to over 150 kg/m² depending on the system specification
- Identify the exact location of structural beams or transfer elements where hanger rods will be fixed
- Check for existing services — M&E runs, sprinkler pipes, and cable trays — that may obstruct track installation or hanger placement
- Engage a structural engineer if the slab or beam capacity is not clearly documented in the as-built drawings
In Singapore’s commercial construction environment, this step often requires early coordination between the main contractor, structural engineer, and M&E consultants. Leaving it to the partition installer alone is a programme risk.
Step 3: Plan the Partition Wall Track System
The partition wall track system is what guides and supports each panel during operation. Its layout determines ease of use, stacking configuration, and acoustic continuity at the head junction.
Straight Track vs. Curved or Branching Layouts
Straight single-track systems are the simplest to install and maintain acoustic integrity. Curved or multi-branch track layouts — used when panels need to stack into a separate storage pocket or recess — require precise fabrication tolerances and additional ceiling support nodes.
When planning the track:
- Confirm the stacking zone location — will panels park flush to the wall, in a dedicated recess, or through a pocket in the adjacent wall?
- Determine whether the track will be surface-mounted or recessed into the ceiling void
- Identify where the track ends and ensure the final panel position does not obstruct doorways, columns, or other fixed elements
- Allow for thermal movement in the track if the space is exposed to significant temperature variation
Step 4: Configure the Panel Layout and Acoustic Specification
Acoustic partition setup begins with selecting the right panel configuration for the required sound reduction index (Rw). In Singapore, commercial interiors commonly target Rw 42 dB to Rw 52 dB depending on the adjacency — for example, a boardroom adjacent to an open-plan office versus a conference room next to a corridor.
Panel Sizing and Sequencing
Panels are typically fabricated between 600mm and 1,200mm wide. Narrower panels are easier to manoeuvre but increase the number of panel joints — each of which is a potential acoustic weak point. Wider panels reduce joint count but add individual panel weight, which affects handleability.
Number each panel in sequence during planning. The pass door, if specified, must be positioned where it is architecturally logical and structurally supported. Document the stacking order clearly so the installation crew can set panels correctly on the first attempt.
Step 5: Execute the Operable Partition Installation
With measurements confirmed, structure signed off, and panels fabricated, the operable partition installation can proceed in a defined sequence.
- Fix hanger rods and primary support steelwork to the structural ceiling at pre-surveyed locations
- Install the track system — align to setting-out lines, check for level along the full run, and confirm curve or junction alignments before final fixing
- Hang panels in sequence — begin from the stacking end and work toward the closing position
- Adjust panel trolleys — set wheel height so panels hang plumb and travel smoothly without binding
- Activate the acoustic seals — most systems use a bottom drop seal and perimeter compression seal; test each panel individually before closing the full wall
- Check panel-to-panel joint compression — inadequate compression at vertical joints is the most common cause of acoustic performance shortfall
Step 6: Conduct a Final Inspection and Acoustic Performance Check
The final inspection is not a formality — it is the step that confirms whether the installed system will actually perform to specification.
Inspection Checklist
- All panels operate smoothly across the full track run without binding, tilting, or requiring excessive force
- Bottom seals deploy fully and contact the floor surface without gaps across the entire panel width
- Head seals compress evenly against the ceiling or head channel
- Vertical panel joints show no visible light gaps when the wall is fully closed
- Pass door (if installed) closes and latches correctly with seals fully engaged
Where the project specification requires it, commission an independent acoustic test to verify the installed Rw performance. This is increasingly standard practice on commercial fit-out projects in Singapore, particularly where tenants require acoustic compliance documentation.
Common Installation Errors to Avoid
| Error | Consequence | Prevention |
|---|---|---|
| Skipping structural load verification | Track deflection, panel misalignment | Engage structural engineer early |
| Inadequate ceiling void clearance | Track cannot be installed as specified | Confirm void depth during survey |
| Incorrect panel sequencing | Panels do not stack or close correctly | Number and document sequence before delivery |
| Uneven floor surface | Bottom seal gaps, acoustic leakage | Level floor screed before installation |
| Insufficient perimeter seal compression | Acoustic performance below Rw target | Adjust trolleys and seals post-installation |
A well-planned acoustic operable wall installation is as much a coordination exercise as it is a technical one. When project managers, architects, and contractors align on each of these steps before the first panel is fabricated, the installation runs cleanly and the finished wall performs exactly as the acoustic consultant specified. For projects in Singapore requiring high-performance movable wall systems, Multiwall provides engineered operable wall solutions backed by technical support across all project stages.
Frequently Asked Questions
How long does an acoustic operable wall installation typically take?
Installation time depends on the wall length, panel count, and track complexity. A standard single-track system for a 6–8 metre opening typically takes two to three days, excluding ceiling support preparation. Larger or multi-branch systems may require additional time for track alignment and seal adjustment.
What ceiling structure is needed to support an operable wall track system?
The track must be fixed to a structural element — a concrete slab, steel beam, or purpose-built transfer structure. Suspended ceilings alone cannot carry the load. A structural engineer should confirm the slab or beam capacity before the track is specified or ordered.
What Rw rating should I specify for a conference room partition in Singapore?
Most commercial conference room partitions in Singapore target Rw 45 dB to Rw 50 dB. Rooms with higher privacy requirements — such as boardrooms or HR interview rooms — may warrant Rw 52 dB or above. Confirm the target with your acoustic consultant based on adjacency conditions.
Can an operable wall be installed on an uneven floor?
Minor floor variation can be accommodated by adjustable bottom drop seals, but significant unevenness — typically greater than ±5mm — should be corrected with floor levelling compound before installation. Unaddressed floor variation leads to seal gaps that directly reduce acoustic performance.
What is the difference between a straight track and a curved track layout?
A straight track is simpler, more cost-effective, and easier to maintain acoustic continuity along the head junction. Curved or branching track layouts allow panels to stack into a recess or storage pocket out of the main space, but require tighter fabrication tolerances and additional structural support at each track curve.
When should a final acoustic test be conducted after installation?
The acoustic test should be conducted after all finishes — flooring, ceiling tiles, and wall cladding — are complete. Testing too early, before final finishes are in place, can produce results that do not reflect actual in-use performance and may need to be repeated before practical completion.