

Home and office safety begins with strong access control. Locks and gates offer the first line of defence, but they may not alert you when trouble arrives. That’s where alarm systems come into play. A well-installed setup doesn’t just detect movement or breaches. It buys you time, warns intruders, and alerts others.
As digital security grows, more people in Singapore explore new solutions. The demand for reliable biometric door access system Singapore services also rises. These high-tech systems use fingerprints or facial scans, adding another level of control. But even the best technology fails without correct installation.
This guide walks through the steps to install alarm systems correctly. You don’t need to be a technician. You just need a steady hand, some planning, and a little patience.
Before You Begin: Plan with Care
Don’t rush. A strong system starts with a clear plan. Walk through your space and decide where protection matters most. Look for entry points — doors, windows, back lanes. Think about what you want to guard.
Create a List of Vulnerable Spots
Start with these:
- Front and back entrances
- Garage or service doors
- Ground floor windows
- Balcony access points
- Hallways and staircases
Every area won’t need the same level of coverage. Some places may need sensors. Others may need motion detectors or glass-break alerts.
Once you identify these points, you can decide what tools to install at each.
Step 1: Choose the Right System
Alarm systems come in various types. Some are wired. Others work wirelessly. Some links to mobile apps. Others tie into central stations. The right choice depends on the size of your property, layout, and daily use.
-
Wired vs Wireless
Wired systems suit permanent homes or buildings under renovation. Their signals stay stable and don’t need battery changes.
Wireless systems install faster and work well in finished spaces. They don’t require drilling and allow easier movement of components.
Step 2: Unpack and Check the Equipment
Once your system arrives, check each part carefully.
Most kits include:
- Control panel or base station
- Entry sensors
- Motion detectors
- Screws, tapes, or mounting hardware
- Alarm siren (built-in or separate)
- Power adapters
- Batteries (for wireless units)
Check your list against the contents. Damaged or missing parts may delay setup. Handle pieces with care. Lay them out on a clean surface for easy access.
Step 3: Install the Control Panel
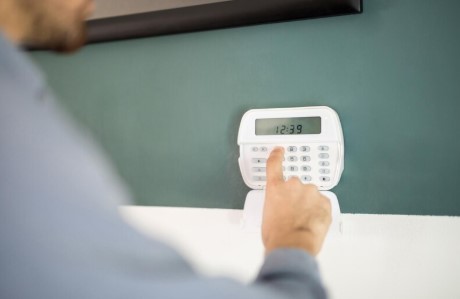
The control panel serves as the brain of your alarm system. It sends signals, stores settings, and allows you to arm or disarm the system.
Where to Place It:
- Near your main door, but hidden from direct view
- Close to a power source
- At eye level for easy keypad use
- Not exposed to direct sunlight or moisture
Mount the control panel using the supplied hardware. For wireless units, make sure the signal strength reaches all sensors from this point.
Step 4: Position and Mount Entry Sensors
Entry sensors detect when doors or windows open. Each unit has two parts — a sensor and a magnet. When these separate, the alarm triggers.
How to Install:
- Clean the surface to ensure the tape or screws hold well
- Align the magnet and sensor less than 1 cm apart
- Mount them on the frame and door (or window) respectively
- Test the sensor by opening the door or window slowly
Install these on every external door. Windows on the ground floor or those near ledges also need coverage.
Step 5: Add Motion Detectors
Motion sensors scan for movement in large areas. They serve best in rooms, hallways, or corners that intruders might cross.
Best Practice for Placement:
- Place them in corners to cover the widest range
- Mount about 2 metres above ground
- Avoid pointing at heat sources like lamps or air vents
- Keep them out of reach of pets (or use pet-friendly models)
Test the range by walking across the room. Adjust the angle if needed.
Step 6: Connect the Alarm Siren
The siren alerts everyone when the system detects a breach. Most kits include one, but you can add extra units if needed.
Tips for Siren Placement:
- Mount near entrances or open spaces
- Avoid enclosed corners that muffle sound
- A place where the sound can travel both inside and outside
- Secure it high up to prevent tampering
For wired models, run the wire safely along corners or behind furniture. Wireless sirens only need strong battery power and signal connection.
Step 7: Power Up and Pair Devices
Now it’s time to bring the system to life. Plug in the control panel. Insert batteries in each sensor. Use the app or main unit to pair all devices.
Most systems use clear lights or sounds to confirm when each sensor links correctly. Follow the steps in your manual for pairing. Some setups may require naming each sensor for easy tracking — like “Front Door” or “Living Room Motion.”
Step 8: Run Full System Tests
Don’t skip this step. It checks that every part works as expected. Arm the system and open doors or walk past sensors. Watch how fast the siren triggers.
Things to Look For
- Delays between action and alert
- Missed signals from sensors
- Weak volume from the siren
- Error messages on the panel
If problems arise, adjust sensor positions or check the battery and signal range.
Step 9: Customise Your Settings
Set up personal codes. Decide on entry delay times. Choose when the alarm arms — all day, at night, or when you’re away. Some panels allow zones — you can arm parts of the house while others stay off.
Create a schedule that fits your lifestyle. For example:
- Arm full system when away
- Arm only doors and windows at night
- Disable alarms during known visitor times
If your system connects to a phone, set notifications for movement or sound detection.
Step 10: Maintain Your System Regularly
Like any home system, your alarm setup needs care. Batteries lose power. Sensors shift. Dust may block signals.
Simple Maintenance Tasks
- Test all sensors monthly
- Check battery levels every three months
- Clean motion sensor lenses with a dry cloth
- Review system logs or alerts often
- Replace worn tape or fix loose mounts
Regular checks keep your system alert and extend its lifespan.
Linking Alarms with Other Security Tools
Some property owners want more than basic alarms. In Singapore, smart setups often blend alarms with features like access control, CCTV, or biometric scans.
Adding a biometric door access system Singapore residents use helps improve entry control. You can lock doors until a fingerprint or face unlocks them. This keeps intruders out and protects sensitive areas.
Many systems now link everything through one app or panel — giving a full picture of security at a glance.
Alarm System Parts at a Glance
To give a clearer overview, here’s a quick reference table showing key alarm components and their function:
| Component | Purpose | Where to Place It |
| Control Panel | Main system control and settings | Near entry, but hidden |
| Entry Sensor | Detects door/window openings | On frames of doors or windows |
| Motion Detector | Detects movement in large areas | Corners of rooms or hallways |
| Siren | Sounds when the alarm triggers | High, open space for sound flow |
| Keypad or App | Arms or disarms system | Accessible to trusted users |
| Backup Battery | Runs system during power loss | Inside panel or near power source |
This quick view helps when checking setup or troubleshooting problems.
Final Thoughts
Installing alarm systems at home or in the office gives more than alerts. It gives peace. It turns concern into action and makes protection part of your daily life.
Every sensor, siren, or setting works toward one goal — to guard the spaces you value. A strong system, installed with care, keeps risk low and confidence high.
Whether you start with basic sensors or explore tools like a biometric door access system Singapore residents now prefer, the process begins the same way: with a plan, a few steps, and the choice to take security into your own hands.